Hay and silage are preserved feed for dairy animals that come in handy during dry seasons when the green forage is unavailable. Silage making involves fermentation under anaerobic conditions preventing fresh fodder from decomposing and allowing it to keep its nutrient quality.
The process needs sufficient soluble carbohydrates (sugars) for organic acid production. It is recommended that you add molasses to the fodder for its rich in sugars, that allow bacteria to produce organic acids immediately. Acidification and preservation process is catalyzed by the amount of molasses that is added. The more the molasses the faster the process.
Read: How to make millions from watermelons farming
Why you should feed your cows on Silage
It improves high milk production as well as healthy dairy animals, particularly during dry seasons. It is laxative, palatable, digestible, nutritious and requires less space as compared to hay.
Preparation of Silage
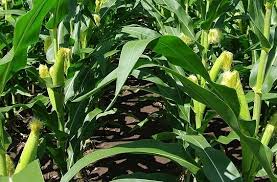
[caption id="attachment_2681" align="alignright" width="277"] Suitable Maize for Silage[/caption]
In Kenya, silage making from maize is popular and forage can be cut from baby maize (at this stage it has highest nutrition value) and can produce maize silage.
Step 1. A farmer needs to decide on the type of crop to be grown for forage or silage. You need to choose hybrid and perennial varieties of crops which can be grown in short duration and produced multiple times.
Step 2. Choose a dry place to dig a pit on slightly sloping ground and depth of the pit should decrease from the higher side of the sloping ground to the lower side by giving wedge like shape. Normally, size and dimension of the pit size depends on the amount of the forage to be stored. For instance, to make 20 bags of forage, you need to dig the pit of 2 cubic metres and 10 m polythene bag and 30 liters of molasses.
Step 3. Using chaff cutter, cut the forage to be preserved into 1 inch pieces.
Step 4. To prevent the forage contact with soil, place the polythene sheet by covering the bottom of the pit and all sides of the pit.
Step 5. Chopped forage should be placed into the pit and spread into a thinlayer and the process repeated until a third of the pit is covered.
Step6. One liter of mollases should be diluted with three liters of water and sprinkled evenly on the forage to be preserved.
Step7. To prevent the forage from rotting, use garden sprayer to evenly distribute the solution (from step 6) throughout silage pit and this will also help in feeding micro-organisms to make the silage ferment quickly and save the silage from rotting.
Step 8. The forage should be pressed with feet to make the air out and protect from fungal attack. This ought to be done with caution as little air causes the fungus and damage the forage.
Step 9. Add more bags of chopped forage after making the room with diluted mollases. Repeat the process of adding forage with diluted molases and pressing until the pit is filled in a doom shape.
Step 10. Pit should be covered after final processing with polythene sheet on top to prevent from any water contact and diga small trench around the sides of the pit.
Step 11. Now the pit should be covered with soil to make the sir out and prevent the polythene damage from rain, birds or any other animals.
Step. 12 The conversation through fermentation may take weeks. Leave the pit until there is a shortage of fodder. The silage can last up to 2 years if it is prepared with well sheeting and good soil cover.
Step 13. To use the silage, open the pit from the lower side of the slope, take the enough silage fodder for one day and close the pit again.
It takes about 30 to 40 days for the silage to mature and be ready for feeding. Never open the whole silage pit at once.
Read: Water storage can help farmers during dry seasons
Silage quality
Silage can be classified as good quality depending on its physical characteristics like taste, smell, and colour but more precisely by measuring the pH in the pit.
A pH of 3.5 to 4.2 indicates excellent fresh acidic/sweetish silage, 4.2 to 4.5 for good acidic, 4.5 to 5.0 fair less acidic and above 5.0 for poor pungent/rancid smelling silage.
Good silage should be light greenish or greenish brown or golden in colour. It should have a pleasant smell like that of vinegar, and acidic in taste, and should not contain mould.
Black indicates poor silage. Overheated silage has the smell of burnt sugar and dry in texture. Badly fermented silage has offensive taste, strong smell, slimy soft texture when rubbed from the fibre or leaf.
Read: Why buy vegetables while you can have your own bag garden?
Feeding Dairy cows with silage
A cow is fed with silage depending on the body weight or generally be given about 6kg to 15kg of silage per day. It is advisable not to feed silage immediately before or during milking especially when the quality is poor as the milk can easily take the smell of the feeds. During these times, a cow can be fed fresh grass, hay, legumes and concentrates. After feeding silage, the bunks and corners of the feeding troughs should be cleaned immediately to prevent contamination.
Read: Profitable poultry farming and production in Kenya
Dairy farmers in Kenya should consider making their own silage rather than buying from outside. If you are planning on having your own silage, plant maize.


